
I was also thinking about expanding this blog beyond just nail polish and start reviewing makeup and other beauty products too, but all in good time.
As I sat down on my first day of full freedom I had time to stop and properly look at my nails, and they were in a state. The 'freebie' polish I had applied in a rush a week before was all chipped and they hadn't been properly manicured since early June!
So for the first time since January I was able to sit and spend two hours on my nails without feeling guilty for not revising, oh the joy of freedom from exams (this is a theme that will come up a lot in my posts, I'm just excited, sorry!!) I googled 'summer nail designs' and found this super cute design and one of those 'appears very confusing on the nail but is actually quite easy to do' designs.
It is based on the movie 'UP' with the ring and middle finger connecting with your thumb to make the little image- you can put these details on either hand depending on whether you're right or left handed. And on the other hand, little clouds and you can add loose balloons if you want!
What you will need:
-Sky blue colour (I used Essie 'Mint Candy Apple')
-Nail art Pens in Black
-Dotting tool, for colours which you don't have pens for
 -Base coat
-Top coat
-Time! This design took me a while!!
Steps:
1. Cut, file, buff nails as needed
2. Paint base coat (I used OPI base coat)
3. Paint 2 coats of your sky blue colour on both hands and let dry
4. Either with dotting tool or nail art pen, draw little fluffy clouds on little finger and first finger on the hand you are doing the design on
5. With the white nail art pen (or dotting tool) draw little lines coming out of the right corner of the top of the middle finger in a wide triangle shape, and the same but out of the left corner of the top of the ring finger ending half way up the nail, you will add the little balloons to these lines later
6. On your thumb, draw a tiny house in the middle of the nail with the black nail art pen. Do this by drawing a square, and draw a line separating the top from the bottom, that will be the roof
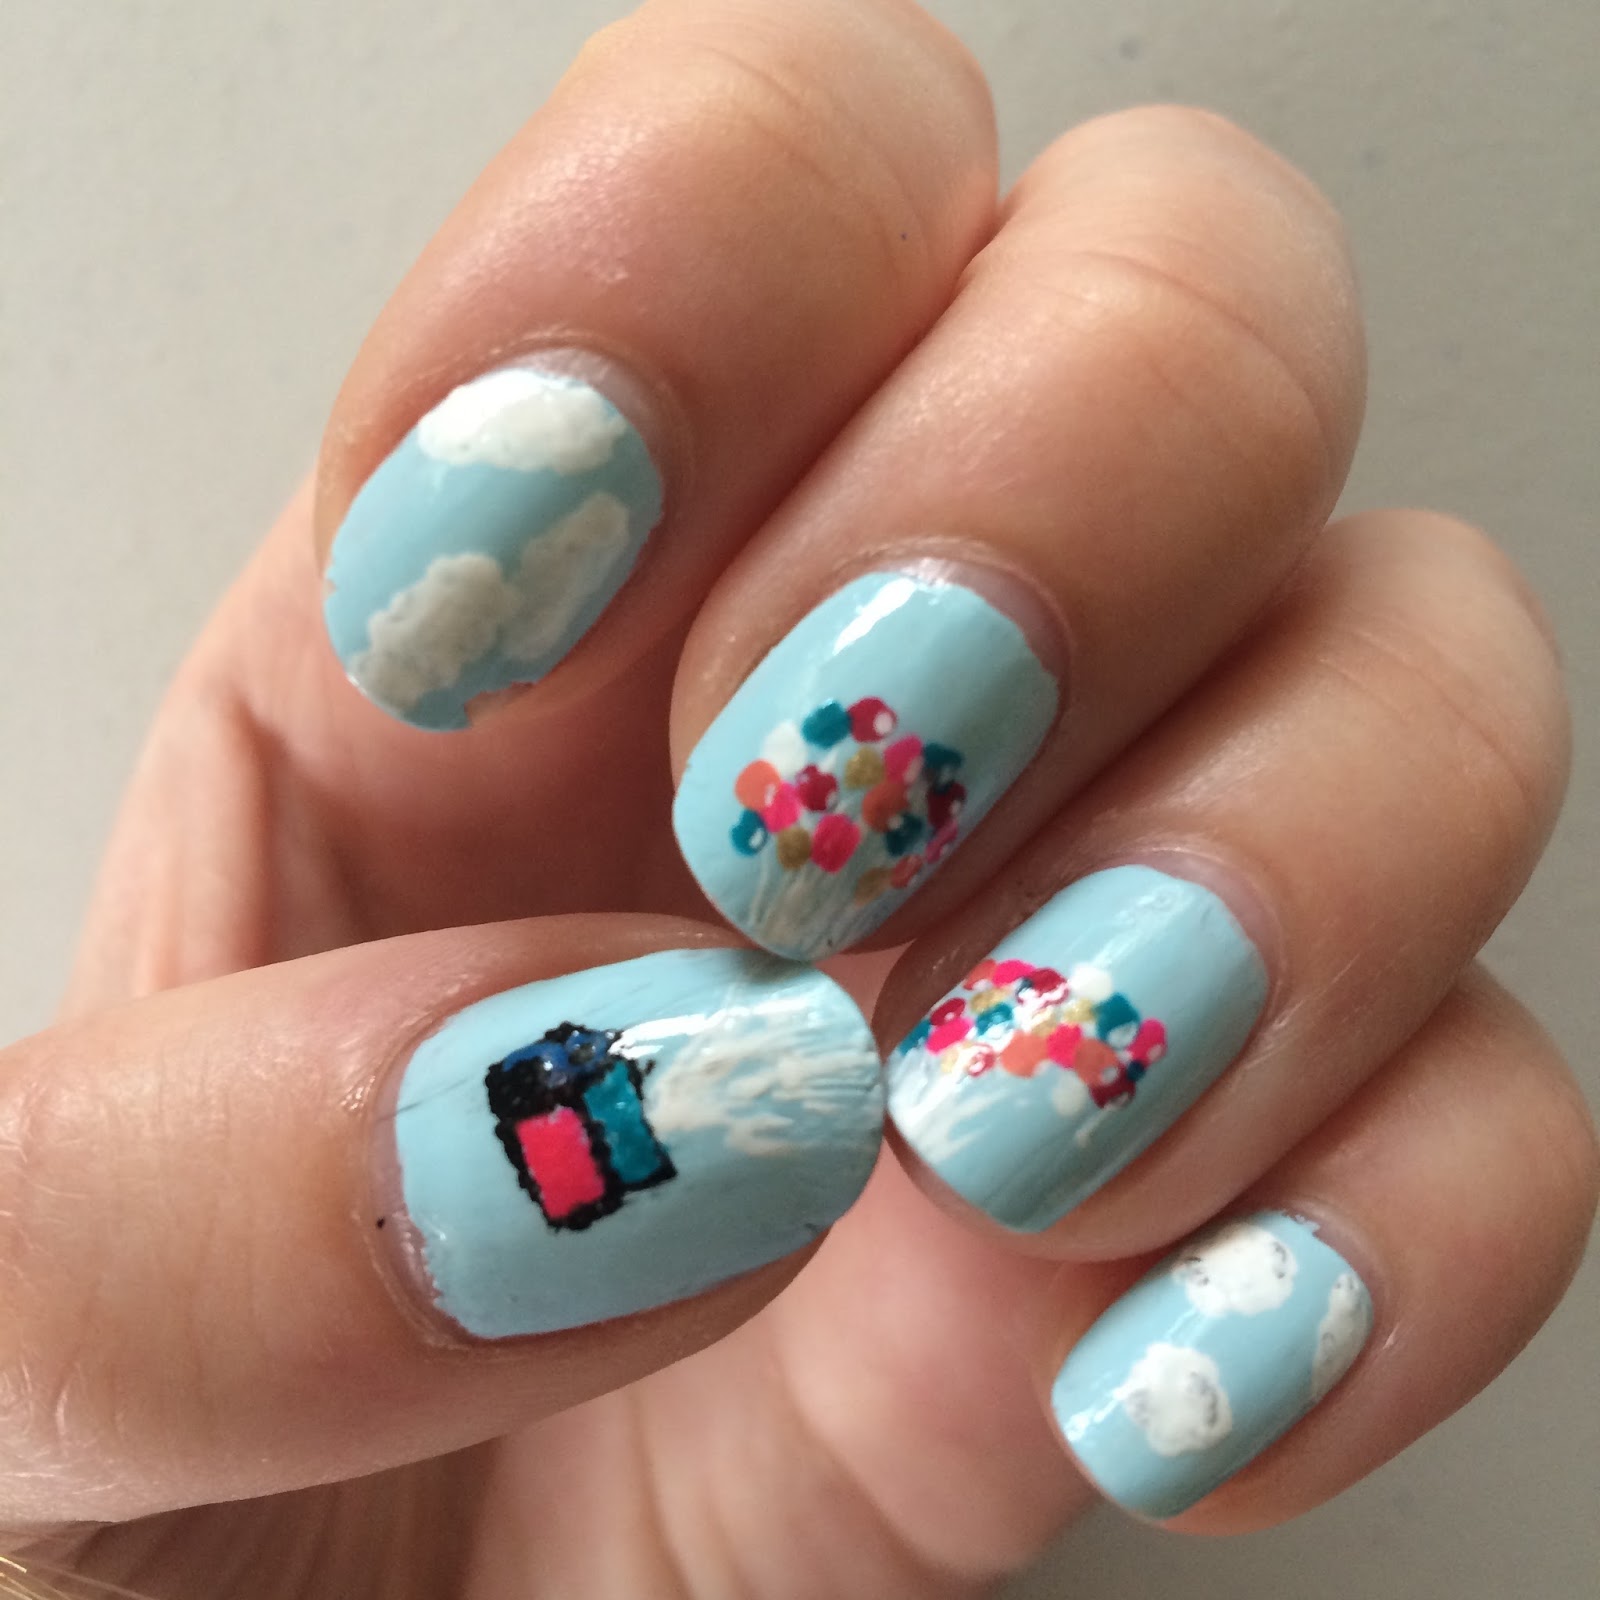 7. Then add another section to the end of the square, with a triangular end, this will be the front of the house where the door is
8.Then draw little white lines coming out of the house to join with the bottom of the other white lines
9. Then colour in the house with any colours you like, bright is better!
10. Then on the middle and ring finger, start to put little dots at the top of the white lines with nail art pens or a dotting tool to make the balloons, do any colours you like
11. When you are happy with how many balloons you've done, place little white flecks on the balloons to make them look more realistic
 12. Then on the other hand draw more little clouds and sky
13. If you want, you can draw more balloons that got loose!
14. Let it dry and then place top coat on, to avoid smudging your design!
and Voila! one 'UP' nail design, this is a super sweet summer design that will create major nail envy, but isn't too hard!!
I hope you enjoy this design!!
Love,
Tash x
No comments:
Post a Comment